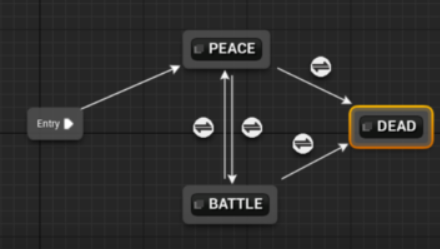
"상태가 동작을 제어하고, 상태는 바뀔 수 있다."는 매우 단순한 아이디어 입니다.
졸음(상태) – 커피(트리거) → 정신이 듦(상태)
상태 패턴의 구현에는 기본적으로 다음의 두 가지 방법이 있습니다.
- 동작을 가지는 실제 클래스로 상태를 정의합니다. 그리고 그 동작들은 상태가 이전될 때 클래스의 변화에 따라 변경됩니다.
- 상태와 상태 전이를 단순히 enum 타입처럼 식별자의 나열로 정의합니다. 실제 상태 변화는 상태 머신 이라는 특별한 컴포넌트를 두어 수행합니다.
상태 기반 상태 전이
가장 간단한 예로 전등을 생각해봅시다. 꺼짐과 켜짐 상태가 있으며 어떤 상태로든 전이 할 수 있습니다.
상태를 enum이 아니라 클래스로 정의합니다.
LightSwitch는 State와 상태를 전이할 수 있는 수단을 가지며 전등 스위치를 통해 상태 전환을 위한 on/off를 구현합니다.
class LightSwitch
{
  State *state; // 상태
public:
  LightSwitch()
  {
    state = new OffState();
  }
  void set_state(State* state)  // 상태 전이 수단
  {
    this->state = state;
  }
  void on() { state->on(this); } // 상태 전환 on
  void off() { state->off(this); }   // 상태 전화 off
};
OnState와 OffState의 구현입니다.
struct State
{
  virtual void on(LightSwitch *ls)
  {
    cout << "Light is already on\n";
  }
  virtual void off(LightSwitch *ls)
  {
    cout << "Light is already off\n";
  }
};

struct OnState : State
{
  OnState()
  {
    cout << "Light turned on\n";
  }

  void off(LightSwitch* ls) override
  {
    cout << "Switching light off...\n";
    ls->set_state(new OffState());
    delete this;
  }
};

struct OffState : State
{
  OffState()
  {
    cout << "Light turned off\n";
  }

  void on(LightSwitch* ls) override
  {
    cout << "Switching light on...\n";
    ls->set_state(new OnState());
    delete this;
  }
};
지금까지의 구현에 대한 이용 코드는 다음과 같습니다.
LightSwitch ls;
ls.on();
ls.off();
ls.off();
수작업으로 만드는 상태 머신
스마트 폰이아닌 구식 전화기의 상태 머신을 만들어봅시다.
전화기의 State enum입니다.
enum class State
{
  off_hook,
  connecting,
  connected,
  on_hold,
  on_hook
};
전화기 State 전이를 위한 Trigger enum입니다.
enum class Trigger
{
  call_dialed,
  hung_up,
  call_connected,
  placed_on_hold,
  taken_off_hold,
  left_message,
  stop_using_phone
};
상태 간 전이가 어떤 규칙으로 이루어져야 하는지에 대한 정보를 어딘가에 저장해야합니다. 여기서는 map을 이용합니다.
map의 키는 상태 전이의 출발상태이고, 갓은 트러거와 도착상태 pair입니다.
map<State, vector<pair<Trigger, State>>> rules;

rules[State::off_hook] = {
  {Trigger::call_dialed, State::connecting},
  {Trigger::stop_using_phone, State::on_hook}
};

rules[State::connecting] = {
  {Trigger::hung_up, State::off_hook},
  {Trigger::call_connected, State::connected}
};

rules[State::connected] = {
  {Trigger::left_message, State::off_hook},
  {Trigger::hung_up, State::off_hook},
  {Trigger::placed_on_hold, State::on_hold}
};

rules[State::on_hold] = {
  {Trigger::taken_off_hold, State::connected},
  {Trigger::hung_up, State::off_hook}
};
현재 상태와 멈추기를 원하는 상태가 있다면 종료 상태도 정의합니다.
State currentState{ State::off_hook };
State exitState{ State::on_hook };
이러한 enum 기반으로 상태 머신을 개발하면 "상태 기반"에서처럼 별도의 컴포넌트를 만들지 않아도됩니다.
사용자와 상호 작용하는 모델을 다음과 같이 구현 할 수 있습니다.
while (true)
{
  cout << "The phone is currently " << currentState << endl;

select_trigger:
  cout << "Select a trigger:" << "\n";

  int i = 0;
  for (auto item : rules[currentState])
  {
    cout << i++ << ". " << item.first << "\n";    // 트리거들 출력
  }

  int input;
  cin >> input;
  if (input < 0 || (input+1) > rules[currentState].size())
  {
    cout << "Incorrect option. Please try again." << "\n";    // 잘못된 트리거가 입력되면 다시 입력 받을 수 있도록 goto
    goto select_trigger;
  }

  currentState = rules[currentState][input].second;   // 트리거의 전이 상태로 현재 상태 설정
  if (currentState == exitState) break;
}
State와 Trigger를 위한 << operator 구현
inline ostream& operator<<(ostream& os, const State& s)
{
  switch (s)
  {
    case State::off_hook:
      os << "off the hook";
      break;
    case State::connecting:
      os << "connecting";
      break;
    case State::connected:
      os << "connected";
      break;
    case State::on_hold:
      os << "on hold";
      break;
    case State::on_hook:
      os << "on the hook";
      break;
  }
  return os;
}

inline ostream& operator<<(ostream& os, const Trigger& t)
{
  switch (t)
  {
    case Trigger::call_dialed:
      os << "call dialed";
      break;
    case Trigger::hung_up:
      os << "hung up";
      break;
    case Trigger::call_connected:
      os << "call connected";
      break;
    case Trigger::placed_on_hold:
      os << "placed on hold";
      break;
    case Trigger::taken_off_hold:
      os << "taken off hold";
      break;
    case Trigger::left_message:
      os << "left message";
      break;
    case Trigger::stop_using_phone:
      os << "putting phone on hook";
      break;
    default: break;
  }
  return os;
}
Boost.MSM을 이용한 상태 머신
Boost.MSM(Meta State Machine)은 Boost에서 제공되는 상태 머신 라이브러리입니다.
여기서 Meta는 Meta programming이며 컴파일타임에 수행되므로 CRTP 형태로 state_machine_def를 상속 받아 State Machine을 사용합니다.
struct PhoneStateMachine : state_machine_def<PhoneStateMachine>   // CRTP
{
  bool angry{ true };

  // State machine의 state들을 정의합니다.
  struct OffHook : state<> {};
  struct Connecting : state<>
  {
    template <class Event, class FSM>
    void on_entry(Event const& evt, FSM&)
    {
      cout << "We are connecting..." << endl;
    }
    void on_exit(Event const& evt, FSM&)
    {
      cout << "We are exiting..." << endl;
    }
  };
  struct Connected : state<> {};
  struct OnHold : state<> {};
  struct PhoneDestroyed : state<> {};

  // 부가적인 동작
  struct PhoneBeingDestroyed
  {
    template <class EVT, class FSM, class SourceState, class TargetState>
    void operator()(EVT const&, FSM&, SourceState&, TargetState&)
    {
      cout << "Phone breaks into a million pieces" << endl;
    }
  };

  // 부가적인 보호 조건
  struct CanDestroyPhone
  {
    template <class EVT, class FSM, class SourceState, class TargetState>
    bool operator()(EVT const&, FSM& fsm, SourceState&, TargetState&)
    {
      return fsm.angry;
    }
  };

  // 출발, 이벤트, 도착, 부가 동작, 부가 보호 조건
  struct transition_table : mpl::vector <
    Row<OffHook, CallDialed, Connecting>,
    Row<Connecting, CallConnected, Connected>,
    Row<Connected, PlacedOnHold, OnHold>,
    Row<OnHold, PhoneThrownIntoWall, PhoneDestroyed, PhoneBeingDestroyed, CanDestroyPhone>
  > {};

  // 시작하는 상태
  typedef OffHook initial_state;

  // 상태 전이가 불가능할때 동작
  template <class FSM, class Event>
  void no_transition(Event const& e, FSM&, int state)
  {
    cout << "No transition from state " << state_names[state]
      << " on event " << typeid(e).name() << endl;
  }
};
상태 전이 이벤트 들입니다. 특별히 다른 클래스의 상속을 받지 않아도 되고 상태 전이 클래스 내부가 공백이어도 됩니다.
struct CallDialed {};
struct HungUp {};
struct CallConnected {};
struct PlacedOnHold {};
struct TakenOffHold {};
struct LeftMessage {};
struct PhoneThrownIntoWall {};
다음과 같은 시나리오로 실행 할 수 있습니다.
// State machine 생성
msm::back::state_machine<PhoneStateMachine> phone;

// 수화기가 내려진 상태
phone.process_event(CallDialed{});
// 전화 연결중
phone.process_event(CallConnected{});
// 전화 연결됨
phone.process_event(PlacedOnHold{});
// 대기중
phone.process_event(PhoneThrownIntoWall{});
// 전화기가 산산조각 남(Phone breaks into a million pieces)
// 전화기가 망가짐

phone.process_event(CallDialed{});
// 전화기가 망가진 상태에서 CallDialed 이벤트는 동작하지 않으므로 no_transition 호출
boost에는 MSM말고도 Statechart가 있다.
devjino.tistory.com
코드 참고 : https://cpp-design-patterns.readthedocs.io/en/latest/
cpp-design-patterns.readthedocs.io
'프로그래밍 일반 > 디자인 패턴' 카테고리의 다른 글
| 템플릿 메서드 패턴(Template method Pattern) (0) | 2020.03.04 |
|---|---|
| 전략 패턴(Strategy Pattern) (0) | 2020.03.04 |
| 관찰자 패턴(Observer Pattern) (0) | 2020.03.04 |
| Null 객체 (0) | 2020.03.04 |
| 메멘토 패턴(Memento Pattern) (0) | 2020.03.04 |